So having done a little groundwork and pulled some basic knowledge together, how do we use it to build a training regime? Firstly, I want to explain why I’ve focused so much on the science. In the training program that I’m going to outline, it might possibly not be what you expect and very likely not what you’ve tried to do previously and because of this knowing that there is logic and reason behind the recommendations should make it easier to follow.
It is really important to understand that this is a long term project, I strongly don’t recommend fixed date style programs such as “Couch to 5k”. This is particularly important in the early stages, this is due to the unpredictable nature of individual training response experienced by everybody in particular people new to exercise or people returning to exercise after a long break. By training response I’m not just referring to improving the typical measure of fitness (speed/distance/heart rate etc) but the core physical adaptations of muscle, joint and connective tissue conditioning. Please review the “You Want To Run” series of posts.
We’ve looked extensively at the concept of training zones and I’ve demonstrated the weakness of using formulas to calculate your max heart rate or indeed the questionable need to know what your max HR is, especially when you are just starting out on your running journey.
I’m going to assume that you are starting from absolute scratch or very close to zero running experience. So, where to start?
I know you want to run, but walking is where we need to start, in fact before we go for a walk take a seat and relax. We can look at HR Watches and other running kit later. But for now assuming that you’ve got a HR Watch, after you have been sat for a while and are genuinely relaxed and you have not consumed coffee or alcohol or any other stimulant, in particular caffeine, take a note of your resting heart rate. It’s best to do this procedure several times over a number of days, ideally at the same time and in similar circumstances i.e. a time of day when you are relaxed and have the time. Once you’ve done the measurement over several days look back at the results, they should all be within a few beats of each other. If there is an outlier result discard it and focus on the collection of similar numbers. The average of these indicates your typical resting heart rate.
[a quick aside, I mention noting your HR results. We’ll look at watches / apps later, but for now a simple note book will suffice as a starting point. A training diary is very useful not only for recording this type of information but also because you will see progress in writing that you otherwise may not notice]
Now we are ready to go out on our first walk, identify a simple route that is relatively flat, it can be circular or out and back it doesn’t matter, whatever works best in your locality. What you do need to do is decide how much time you want to dedicate to your training; how many minutes per session and how many sessions per week. Initially our focus will be much more on ‘time on feet’ rather than distance covered. These are early days so we don’t need to go mad, depending on how fit you think you are (be honest) allow 20-30 minutes. So fasten up your trainers (more on those later), tighten your watch a little to help get a more reliable HR reading while moving. Stand up, stand still for a few moments and make a note of your standing HR, it’s likely 10-15 BPM more than your resting figure.
Start off at a gentle, but not ambling pace and sustain that pace for about ten minutes. As you walk at that steady pace keep an eye on your HR, it should start to level out. When it does level out make a note of your HR. Having done that, try to gently speed up a little, walk with a little determination imagine you’re running late for an appointment. You want to arrive on time but not in a sweaty mess! Again watch your HR increase, after ten minutes note if it levels out and also note your breathing. Depending on your current fitness your HR might stabilise and your breathing might be quiet and comfortable. If your HR doesn’t stabilise (it continues to increase) and - or your breathing is noisy and possibly a little uncomfortable you have already hit the exertion level you need to start training. Now slow down back to an ambling walk and make your way home and make a note of your HR numbers and any thoughts on how hard or easy it felt and what your breathing was like. What next?
Scenario 1: Your HR didn’t stabilise AND / OR your breathing was louder than normal and possibly uncomfortable. If this is you then the effort that you put into this test is, for now, sufficient for you to train at and gain benefit, without running the risk of over exertion. Your next few sessions will simply be the same as the initial test. You should continue walking easy until you find your breathing / HR and sense of exertion all start to level out and you match the criteria of Scenario 2 below.
Scenario 2: You completed the test for thirty minutes comfortably with a stabilised HR and your breathing was easy, quiet and unstrained. I’m now going to use some arbitrary HR numbers, these are just to illustrate an idea and are NOT targets or recommendations.
So let’s assume that your resting (sitting) HR that you checked at the very beginning was about 65 BPM, your standing score was 75 BPM and your brisk walk score stabilised at around 105 BPM. If you are exercising comfortably you should notice that when you stop walking your HR will drop down within a few minutes back to your standing HR score (75). Also over time and regular exercise all of these numbers will drop a little, this is a sign of increasing fitness and is one of the values of recording your numbers.
I mentioned earlier that we will be focusing on time on feet rather than distance. You might have found that after a few outings on your test course you are now getting home a little sooner than before and you are no longer out for thirty minutes. So it’s time to modify your route, if possible find a route that can be adjusted easily or allows a quick route home from a number of points on the route, this allows you to extend your route easily. Think of your home (base) as the hub of a wheel, go out along a spoke exercise around the rim and return along another spoke. Having a reasonably set route, although possibly boring, makes using your HR numbers and general sense of effort more day to day comparable. We can vary the route more later as we progress.
OK so we’ve established some baselines, we know what our HR is when we are resting and when we are walking both gently and with some effort. The HR we established when walking quickly with effort is in our Training Zone (TZ) 1 (refer to the image above for a refresher) we can’t be sure exactly where about within the Zone you are. If the heart rate was stable (not increasing) you are probably comfortably in TZ1, if it was slightly creeping up you will be at the upper end of Training Zone 1, if it was going up noticeably then you were in scenario 1 (above) and you’re not ready for what follows.
Now we need to go for a little bit of a run to explore your general Training Zone 2 area. It should be noted that our Training Zones are NOT evenly spread. You will often see information telling us the such a Zone is xx% of max HR and another Zone is xxx% Max HR. As mentioned these ‘off the peg’ numbers are very much generalisations and only offer very approximate guides. What we need to do is find a level of effort that you can maintain without your HR shooting up very far and that allows you to breath easily enough so that you are still able to speak relatively normally. This process might take a little experimentation and in all likelihood will involve a mixture of jogging and walking. For our purposes jogging means a shuffling low foot lift movement that may only be very slightly quicker than your quick walking speed. Finding this easy conversational pace is crucial, I can’t emphasise enough that there is NOTHING to be gained by going quicker than this at this stage except for injury and disappointment.
So after about ten minutes of walking along your usual route gradually increasing you pace until you hit you quick walking pace with your HR around the 105 (remember this is just an example from above). At this point start to walk more quickly until you feel the need to jog rather than walk, depending upon your fitness you’ll see one of two things: Again two scenarios.
Scenario 1: You start to jog easily and you HR creeps up gradually and settles perhaps 15 - 20 beats per minute (BPM) faster than your base (105) and more importantly your breathing remains easy and comfortable, this should be within your TZ2 area. Your HR and easy breathing should be maintained for about ten minutes at that point resume your walking pace and start to head home.
Scenario 2: As you start to jog your HR increases quickly and your breathing starts to become loud and a little strained. If this happens resume your walk until the HR settles close to your walking HR and try a jog again, this time try and go a little slower. If the same thing happens again and you’re sure you can’t jog any slower, then you need to adopt a walk / jog approach. Simply jog for a minute walk for a minute repeatedly, maintain this for ten to fifteen minutes and resume steady walking and head home. Make sure that your walking HR drops down to your previously established walking HR and when running don’t persist when your breathing becomes hard and HR lifts by more than about 20 BPM above walking HR. With a little practise you’ll learn to do tis by feel, which is an important part of your self education, learning how to feel your exertion level.
We now know where your fitness is at, whichever scenario you fitted into you will repeat the same exercise for three to six times over a couple of weeks, no further no faster. Exactly how many times will depend upon how you feel the day after each run. If the day after your run you feel fine, with no aches at all, then the day after go out and repeat, basically day on - day off - repeat. Any time you notice any aches or general muscular fatigue, take an additional day off. If you feel tired or achy after your first run take two days off, or three if that is what is required to be ache free. As mentioned previously running isn’t just about cardio fitness you have to allow your structure (muscles, bones, ligaments) to adjust to the new load.
That’s quite a lot of information to take in, so I think we can, except for one important point, call it a day for today.
The one important subject that should be mentioned is that of running shoes. It’s a big subject which we can explore later. But for now all you need to know is that you don’t need an expensive pair of shoes and to start with you’ll be better off with a relatively thin soled show. I know it’s tempting to go for a thick, squishy super comfortable pair of shoes, but to start with you’ll benefit from a shoe with just a little padding to protect your feet, but still lets you feel the ground, this enables your body to learn how to find the ground and for the muscles to learn how to control your foot’s action on the ground. Your currently only doing short runs, so you don’t need thick shoes, as your fitness improves you may chose to go for something different but to start with a little padding is the way to go. Remember this is a long term project, you’ll get through lots of shoes! The three images show some examples, the light blue shoe is known as a minimalist or barefoot shoe, that is probably too thin for comfort to start with. The dark blue is a high cushioned shoe, probably too thick to start with and the white / green shoe is something similar to what you should be looking for.
We’ll look at building on the base we’ve established here in the next post.
#personaltrainer #couchto5k #trainingzones #heartratezones #healthandfitness #startrunning #newrunner

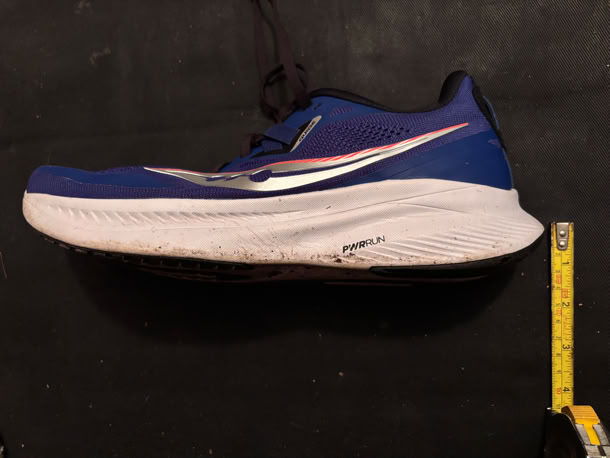
Comfort Shoe
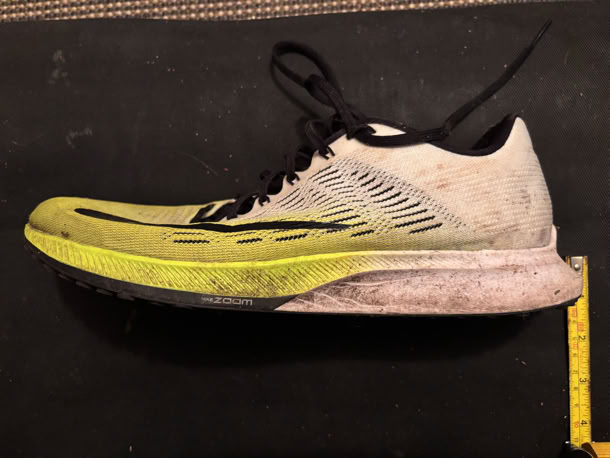
Thin Soles Shoe
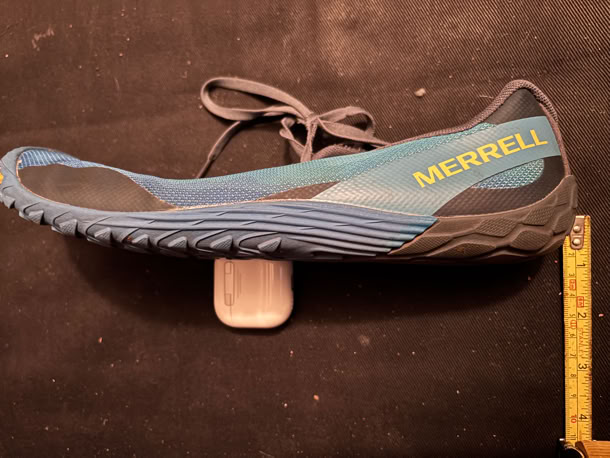
Minimalist Shoe